This User Guide will acquaint you with the basic functions of the .Blog administration system. For instructions on how to install .blog on your web site, please refer to the .Blog Installation Guide.
This User Guide contains the following information
Blogroll
IP Banning
Blacklisting
Categories
Adding a new weblog entry
Editing/deleting existing weblog entries
Viewing and editing comments
Managing trackbacks
The Bookmarklet
Spam Killer
Standalone Trackback Pinger
Uploading Files

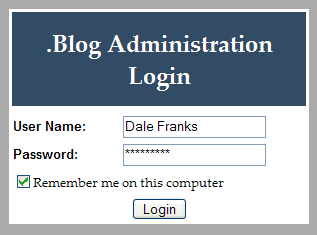
When logging into the .Blog application, your user name and password are stored as cookies in your browser. If you check the "Remember me on this computer" check box, the cookies will be stored on your computer for 999 days, essentially making your login permanent. If the box in unchecked when you log in, the cookies will be temporary ones that will expire in 6 hours after your login. When you login, you will be taken directly to the "Edit Entries" page.
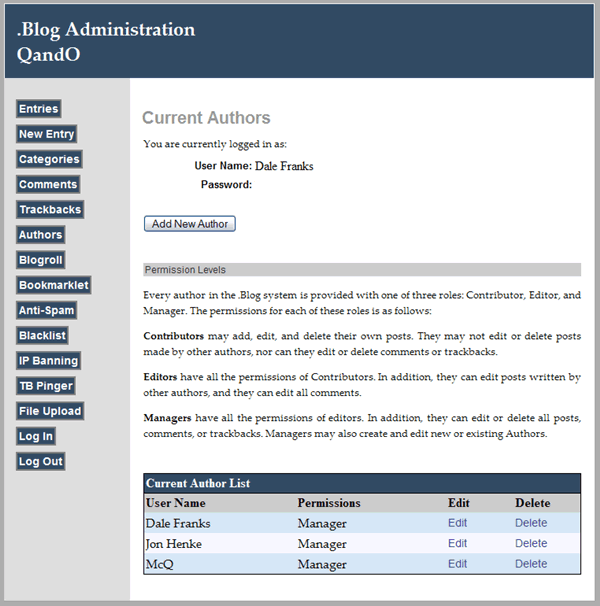
The authors page identifies all of the authors who are allowed to make entries at your blog. From this page, you can edit or delete current authors, or add new authors.
At the bottom of the page, all current authors and their security permissions levels are listed.
Every author in the .Blog system is provided with one of three roles: Contributor, Editor, and Manager. The permissions for each of these roles is as follows:
To add a new author, click the "Add New Author" button. To edit or delete an existing author, click the appropriate link in the author list at the bottom of the page.
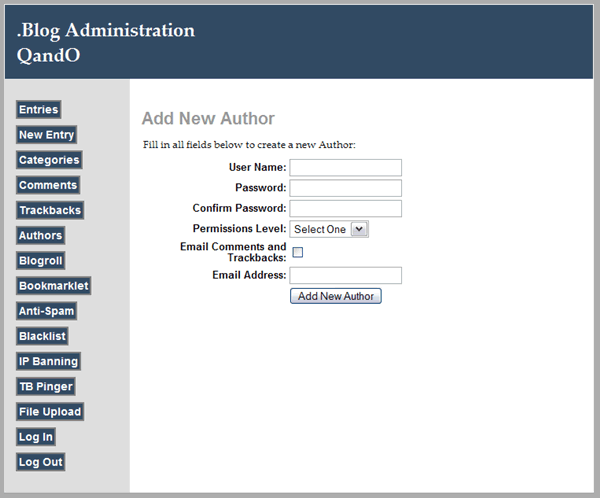
To add a new author, fill in the New Author form competely, then click the "Add New Author" button. The new author will be added to the database.
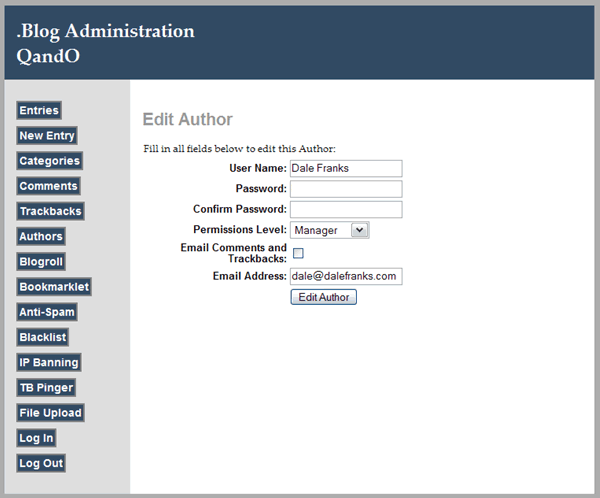
To edit an existing authors information or security permissions, make the appropriate changes to the Edit Author Form, then click the "Edit Author" button. If you elect to receive email messages containing the comments and trackbacks to your posts, then you you will be required to add an email address if you click the "Email Comments and Trackbacks" check box.
.Blog allows you to create a blogroll on your site without having to open your template page and edit the HTML. On the Blogroll page, simply fill out the form to enter the Name and URL of the blog you wish to add to your blogroll. Then click the "Add Blog" button to add it to your blogroll. The blog will automatically appear on your main blog page.
Every computer that has access to the Internet, and every web site in the world, has an IP Address. The internet relies on a communications protocol called TCP/IP that allows computers all over the world to talk to each other. As part of this protocol, every computer and web site must have a unique IP Address. This IP Address is Four sets of numbers, separated by a period. An IP address looks something like this: 11.54.172.24.
Although you may not know it, your web browser uses IP Addresses to go to different web sites. Every web site in the world has an IP Address. But, while IP Addresses work great for computers, they aren't so good for humans. So, web sites have URLs, with easy-to-remember names. Those names are for human convenience. Behind the scenes, each URL is associated with an IP Address. So, when you type "google.com" in the address bar of your browser, what your browser actually sees is the IP Address associated with Google. Similarly, every time your computer goes on the internet, it has a unique IP Address assigned to it, too.
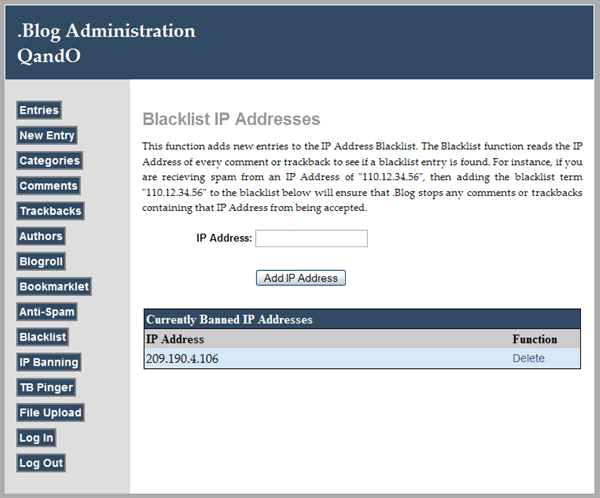
.Blog stores the IP Address of every comment and trackback that your weblog receives. By banning an IP Address, .Blog will reject any comments or trackbacks that come from that IP Address.
IP Banning isn't perfect. While every web site has a unique IP address that never changes, this is not always true of computer users who are surfing the web. Some Internet Service Providers (ISPs) assign a fixed IP Address to every computer to whom they provide internet access. Some ISPs, however, don't do this. Instead, they have a whole range of IP Addresses. When a user logs on, the ISP assigns that computer an available IP Address that will work until the user logs off. For ISPs that do this, their users may have a different IP Address every time they log on. So, while IP banning works well for trackback spam, that comes from a fixed IP Address, it may not work as well with trying to ban individual users.
Fortunately, IP Banning isn't the only anti-spam measure .Blog uses.
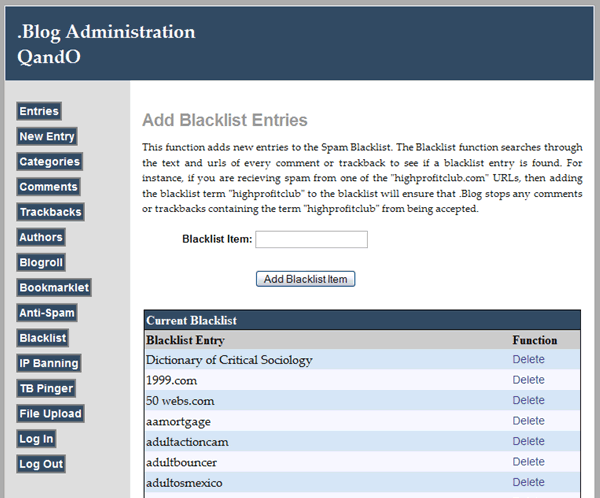
The Blacklist feature allows you to specify words or exact phrases that you do not wish commenters or trackbacks to use For instance, of you wish to ban the use of obscene words in comments, you can add the offending words here. After the word has been added to the blacklist, .Blog will not save any comments that contain the blacklisted term. This is a useful addition to IP Banning, because some spammers may attempt to send trackback or comment spam from different computers, which will all have different IP addresses.
For instance, a well-know spam domain is highprofitclub.com. They may have a huge number of subdomains, each of which have their own IP Addresses. So, you could receive trackback spam from "realestate.highprofitclub.com", "poker.highprofitclub.com", or "vacations.highprofitclub.com". Simply by adding the term "highprofitclub" to the blacklist, .Blog will reject any comment or trackback that contains the word "highprofitclub" in the text, email address, or URL. This will end all of the highprofitclub.com spam, even though the different spammers will have different IP addresses.
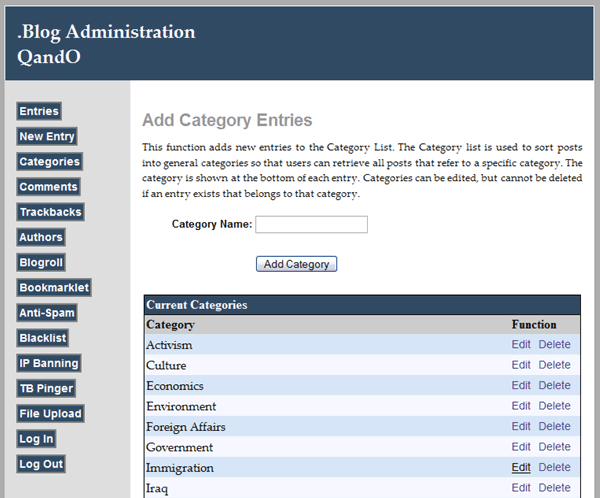
.Blog allows you to organize weblog entries by placing them into categories. You may make as many categories as you desire, but, once a weblog entry has been added to a category, you cannot delete that category until all of the weblog entries in that category have been either deleted, or assigned to other categories. You can, however, edit the name of the category at any time.
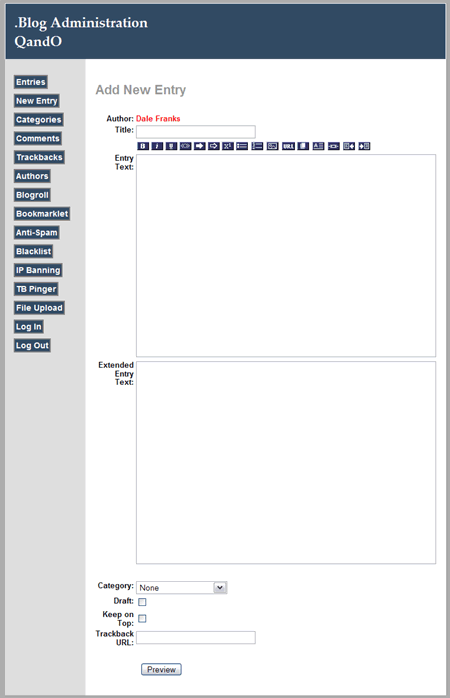
As a minimum, when adding a new blog entry, you should fill out the "Entry Title" and the "Entry Text" fields. For long entries, or entries for which you do not wish to display all of the entry text on the your blog page, you may also fill out the extended entry field.
When you use the "Extended Entry" field, your main blog page will display a link that the user can click to see the extended entry text when reading your weblog.
Each post can be categorized, and you can add or remove categories as described in the Categories section of the user guide. By default, new posts are placed in the "None" category.
If you wish to write a post, but not have it published publicly yet, then click the "Draft" check box. This will save your post, but it will not be available on your RSS feed or main blog page until you edit the entry and uncheck the "Draft" box.
If you want to keep a post at the top of your blog, so that it keeps high visibility, click the "Leave on Top" check box. The post will appear at the top of your blog page until you edit the entry and uncheck the box. If you have more than one entry kept at the top of the page, the entries will appear in reverse chronological order.
At the bottom of the form is a text box into which you can place the trackback URL for the post to which you wish to link.
Additionally, every time you create a new post, .Blog will send a trackback ping to the Ping-O-Matic public trackback service. This is a publicly available weblog update service that sends a notification to the major weblog update tracking services, like weblogs.com, so that the world can be notified that your weblog has been updated.
Once you have finished entering the text of your weblog entry, click on the "Preview" button at the bottom of the form. When you do so, a preview of your post, as it will appear on your weblog, will be displayed at the bottom of your form. You can now look over your post to ensure it is correct. If it is not, edit your post again, then click on the "Preview" button again to see the results of your edits. When you are satisfied with the appearance of your post, click on the "Add Entry" button to create the new entry.
The new entry screen has a HTML toolbar that adds a variety of formatting HTML tags to your entry.
![]()
The tools included on the toolbar, when reading from left to right, are as follows:
Using these tools may take a little practice, especially if you are unfamiliar with HTML. You may need to experiment with them so that you can beco me comfortable with how they work.
While the tools work in all major browsers, Internet Explorer and other browsers may make them work a bit differently. For example, in Internet Explorer, you must select some text in your post before clicking one of the tools. If no text is selected, then clicking one of the tools won't do anything. In Firefox, on the other hand, as long as the cursor is in the Entry Text box, the tools will work whether you have selected any text or not.
In general, the way to use one of the tools is as follows. Let's say you want to italicize a word. First, highlight the word with your mouse. Then, click the Italic tool. When you do so the word will appear surrounded by the appropriate HTML tag. For example, if you highlight the word "very", then when you click on the Italic tool, it will be replaced by "<em>very</em>". When this is displayed in your weblog's HTML page, it will be italicized.
The exceptions to this method of operation are the Image and Divider tools. Neither of these tools surrounds text with HTML tags. Instead, they both insert standalone HTML snippets into your post. When Using Internet Explorer, though, you must remember that the IE requires some text to be highlighted. An easy way to make these tools work is to type a space, highlight it, then click on the tools to insert othe HTML for the image you want to display, or the divider image.
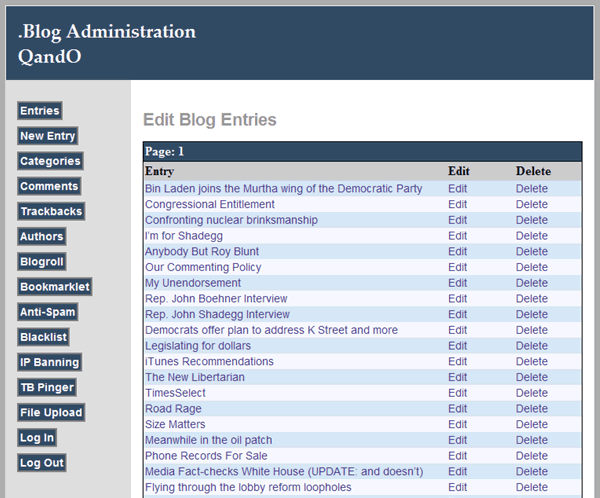
The Entries page displays all of your existing weblog entries, with 30 entries on each page. Entries are displayed from the most recent to the least recent. To scroll through the entries, click on the "Next" or "Previous" buttons that appear on the bottom of the form.
To edit or delete an entry, click on the appropriate links in the entry list. You can also see the details page of each entry from your weblog by clicking on the entry title.
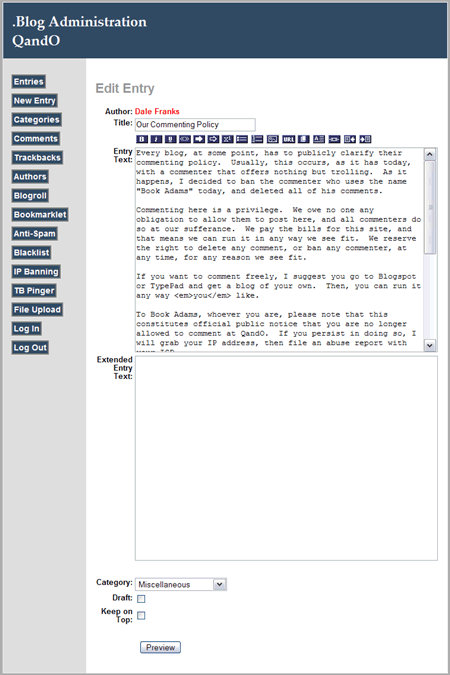
The Edit Entry page works just like the Add New Entry page, except that when the Edit Entry page opens, the text of your entry will appear in the appropriate text boxes. You can then edit, preview, and save changes in the same way you do in the New Entry page.
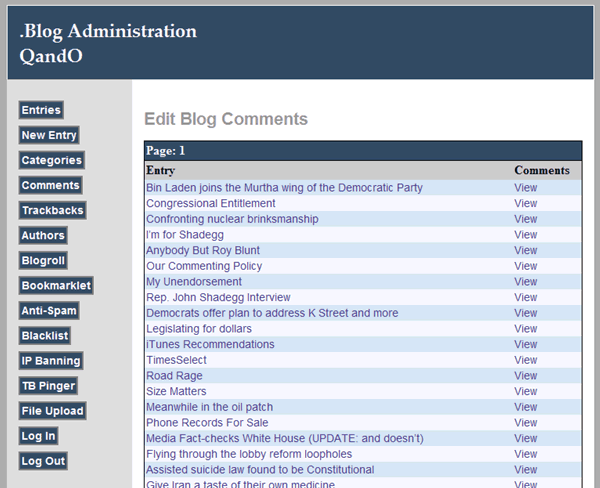
The Comment Listing page is very similar to the Entries page, except that it only shows entries for which your readers have written comments. To edit comments for a post, click the "Edit" link by the post whose comments youd like to edit. When you do so, you will be taken to the Edit Comments page for that post.
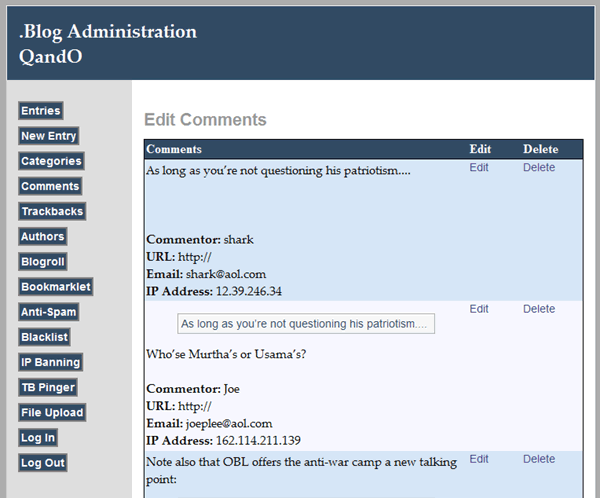
This page displays all the comments for the post you selected. Each comment has links that you can click to edit or delete the comment. If you wish to edit a comment, then click the link and you will be taken to the Edit Comment page for the select comment. The IP Address of each commenter also appears, so that you can use the IP Banning feature to prevent any comments from that IP Address from being recorded.
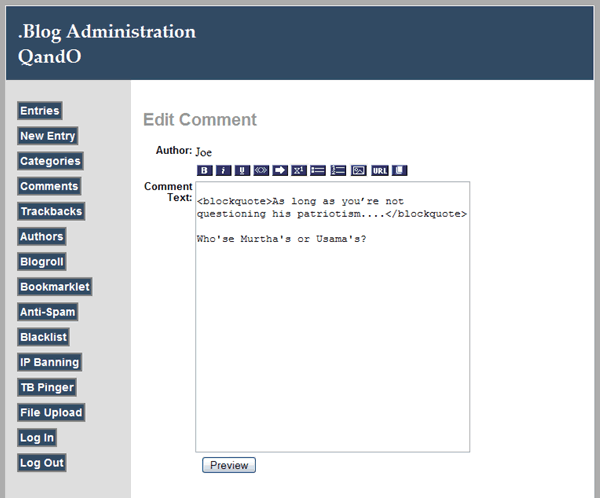
Again, this page works very similarly to the other editing pages in the Adminsitration console. It has a simlar suite of edition tools, and allows you to preview the edits you make before submitting them.
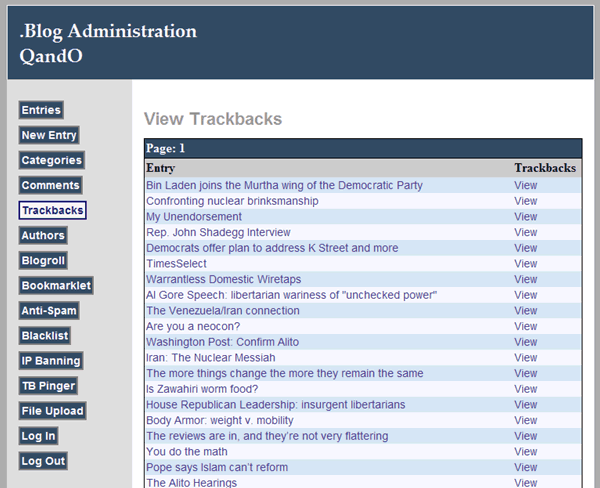
The View Trackbacks page is very similar to the Entries page, except that it only shows entries for which other blogs have sent trackbacks. To view the trackbacks for a post, click the "View" link by the post whose trackbacks you'd like to see. When you do so, you will be taken to the Trackback Details page for that post.
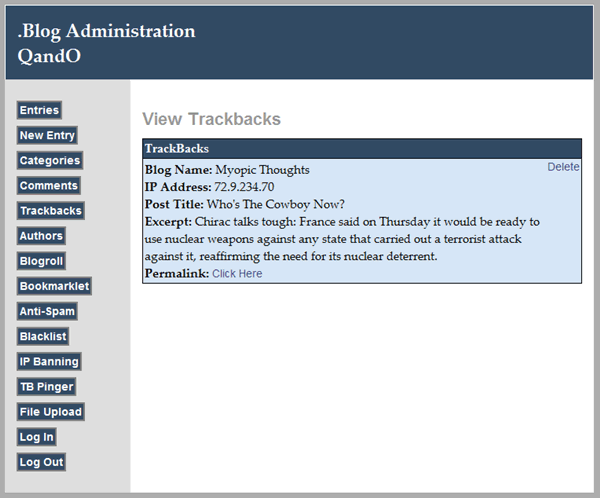
You cannot edit trackbacks, but you can delete them by clicking on the "Delete" link by the trackback you want to delete. The IP Address of each trackback also appears, so that you can use the IP Banning feature to prevent any future trackbacks from that IP Address from being recorded.
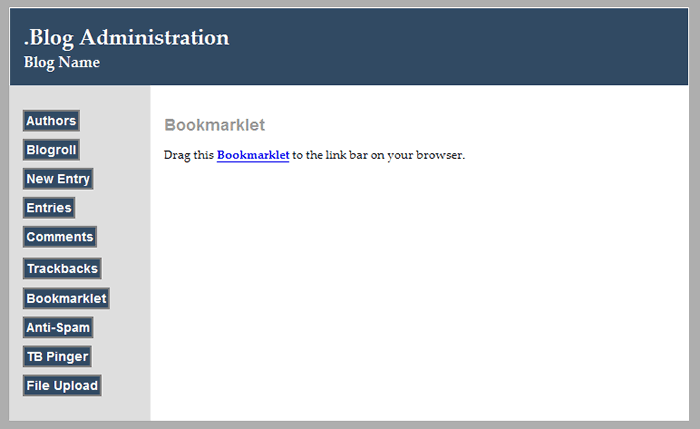
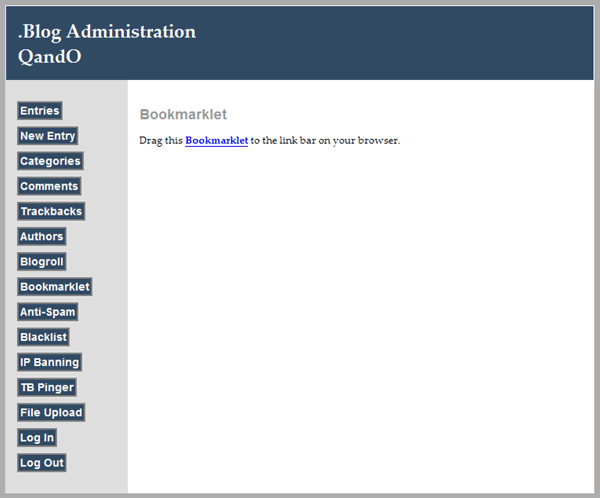
.Blog help make creating weblog entries a little easier by creating a bookmarklet that you can drag to the Links toolbar on your browser. That way, you don't have to to leave a browser window open at your Add Entry page, while using another browser window to browse the internet for articles, etc., to which you'd like to link. Instead, when you find an article you'd like to link to, all you have to do is click on the bookmarklet link, and a new browser window will automatically open to your Add Entry page.
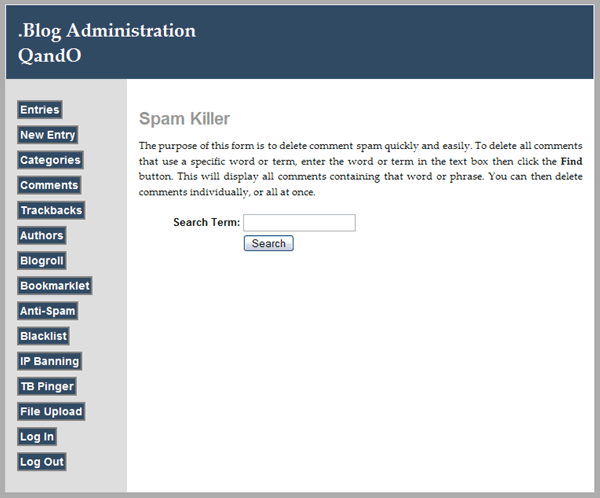
.Blog offers a convenient way to get rid of comment spam vis the Spam Killer page. It's also convenient for general use to find comments that match a specific search term. Simply enter a search term into the text box, and click on the "Search" button. When you do, all the comments that match that term will appear. You can then delete comments individually, or all at once. Being able to delete individually is convenient, especially when some terms used by comment spammers, such as "cialis" are also parts of other words, such as "socialism". You may want to delete all the comments for "cialis", while keeping all the comments containing "socialism".
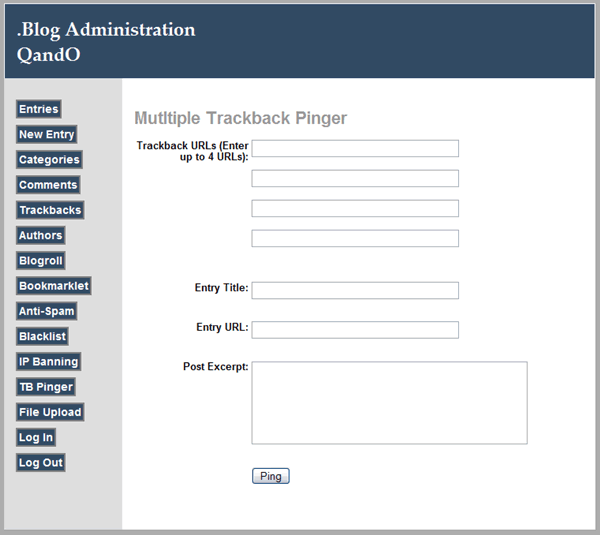
In addition to the trackback ping that you can send when creating a new post, .Blog also has a standalone trackback pinger that you can use to send trackback pings to up to four URLs. To send these pings, do the following:
This will send the trackback pings to the URLs that you have selected.
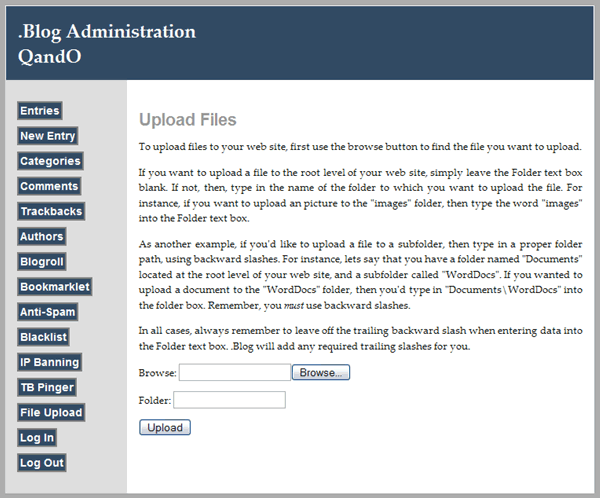
.Blog allows you to easily upload files to your web site, such as images and documents from your computer. To do so, first find the file on your computer by clicking the browse button. When you do so, the File Upload dialog box will appear.
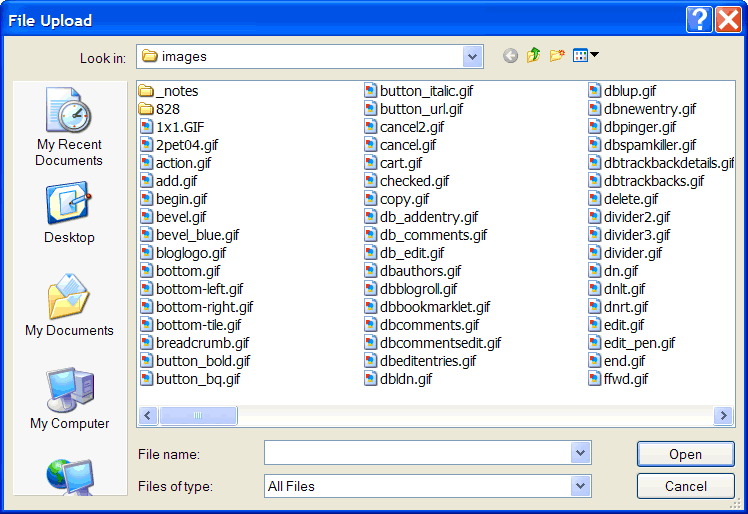
You can use this dialog box to browse through your computer and find the file you wish to upload. Once you have selected the file, now you must select the folder to which you want to upload the file. To upload a file to the root level of your web site, simply leave the Folder text box blank. To upload an image to the "images" folder on your web site, simply type the word "images" into the Folder text box. Now, let's say that you have a subfolder in your "images" folder where you store news photos, and you've called that folder "news". If you want to upload an image into that folder, then type in the term "images\news". Be sure to use the backward slash "\" instead of the regular slash, because the upload function uses the actual file system on your web host's server computer, not a URL path. also, be sure that you leave off any trailing slashes. .Blog will add any needed backward slashes automatically.
Once you've selected the file, and entered the appropriate folder path, click the "Upload" button to upload your file. Once you have done so, a message will appear letting you know if your upload was sucessful.
An important point to remember is that, when you attempt to upload a file, your folder permissions for the folder you have chosen must be set properly to allow you to write files to that folder. Setting these permissions is done through your web host, so be sure to contact your web host with any questions about how to set permissions on your web site's folders.
This should give you all the information you need to use .Blog's adminstrative console. For questions about how to install .Blog, please refer to the Installation Guide.